Homemade Party Rings Recipe – Party Rings Biscuits

A fun kitchen project, making colourful homemade Party rings biscuits is a nostalgic recipe that’ll transport you back to childhood with their crunchy texture and colourful icing. Great for gifts, parties and afternoon tea.
Recipe Overview
Skill Level:
Intermediate
Prep Time:
45 MINUTES
Cook Time:
10 MINUTES (+ setting time)

What Makes This Recipe Great
A fun kitchen project that kids can get involved with.
Party Ring Biscuits make a great gift or party treat.
You can colour them any way you like, to suit your theme.
I’m pretty sure that when you speak to any adult born in or around the 80’s and mention Party Rings, it will transport them back in time to some loud, crazy kids party, possibly having a My Little Pony or Thundercats theme, a game of pass the parcel, a buffet of jam sandwiches, an array of crisps and a plate of these little iced biscuits plonked somewhere in the middle.
Let’s face it, no kids party was the same without iced party rings biscuits!
I, for one, like to indulge the child within and enjoy a few little party biscuits every so often.
The biscuit mix is simple and easy to make, you can make them in any size you like and you can freeze the dough for future use too!
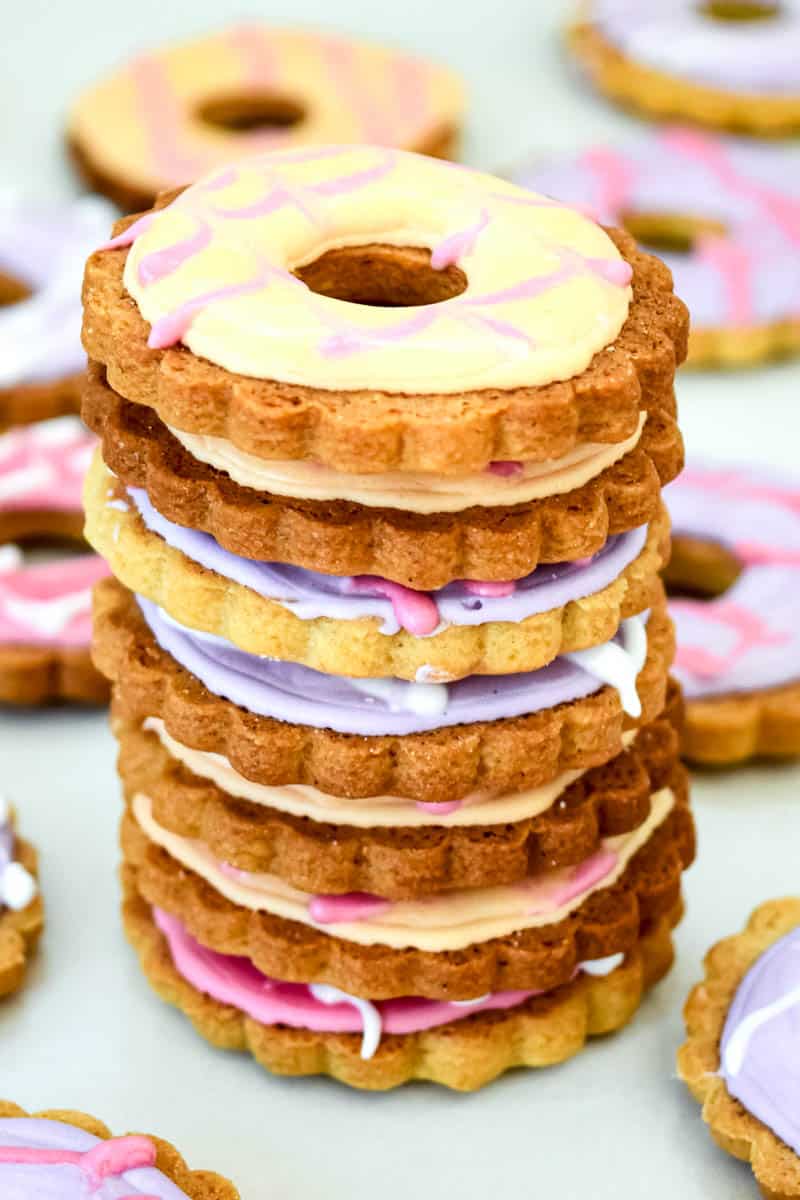
You can decorate these cute little round biscuits with a hole in the middle in any colour theme you want, making them great for parties and gatherings with a specific colour theme. The choice is endless! Since this biscuit recipe makes 30, you have plenty of iced ring biscuits to experiment with.
What is Flood and Line Icing?
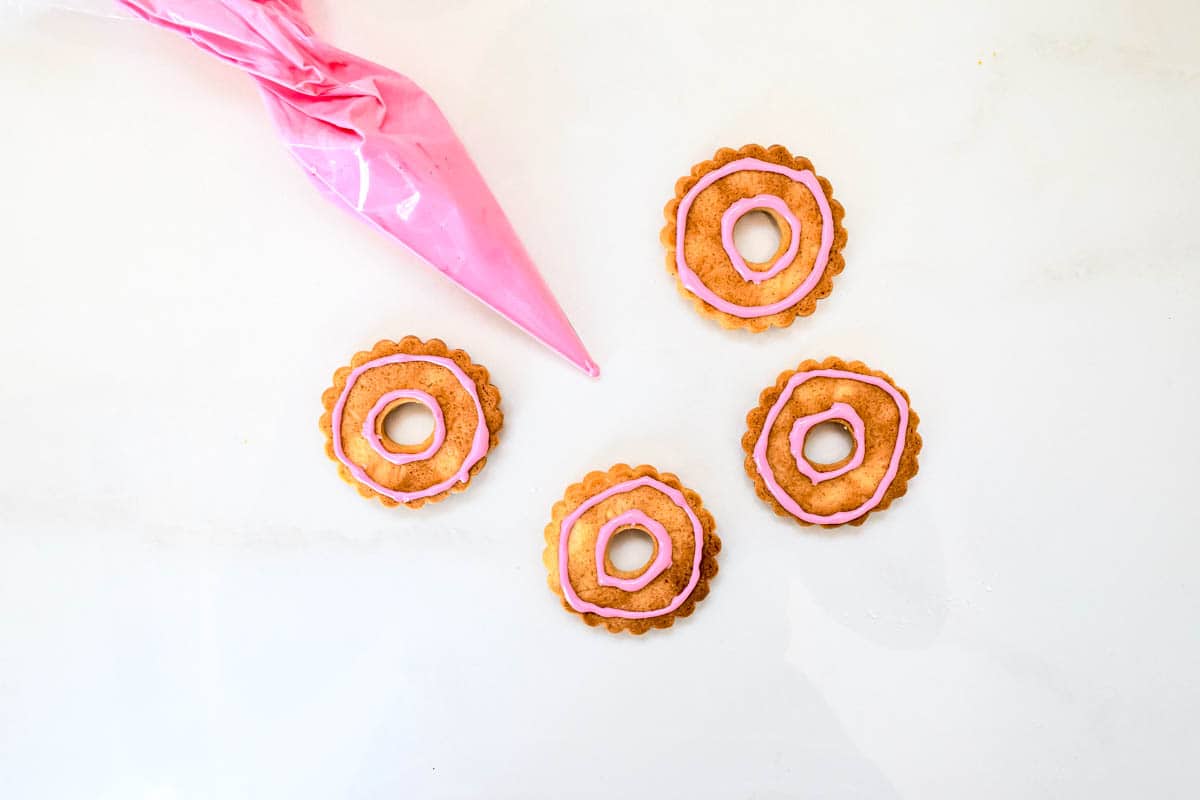
I have used a method called flood and line icing to decorate, this helps to keep the icing on the biscuit without it dripping over the edges.
Firstly, you create a line around the outer and inner edges of the biscuit and the hole in the middle with icing that is a thicker consistency so it holds its shape and doesn’t melt off the biscuit.
Once the line is set, you use a runnier version of the same icing to fill the biscuit in between the lines “flooding” the area so it spreads, creating a smooth and even finish.
However, if you don’t have enough time of the patience to try this technique, just ensure your icing is thick enough and spread a thin layer over each biscuit. The taste will be the same of course, they just might look a little messier.
Check Out More Biscuit Recipes:
Equipment Needed:
- Large Mixing Bowl: A large bowl is needed for mixing the cookie dough. You can mix by hand or use a stand mixer with the paddle attachment. You” also need smaller mixing bowls to create the icing and make different colours.
- Sieve: For sifting the flour. It’s important to sift the flour mixture, not only does it mix the dry ingredients together well and prevents lumps, it also introduces air to the mix, keeping the biscuit crumb light.
- Electric Mixer or Whisk: For ease, I prefer to use an electric hand mixer when creating the icing. You can also use a stand mixer with the whisk attachment.
- Clingfilm (Plastic Wrap): To wrap and chill the dough.
- Rolling Pin: The dough needs to be rolled out thinly and evenly.
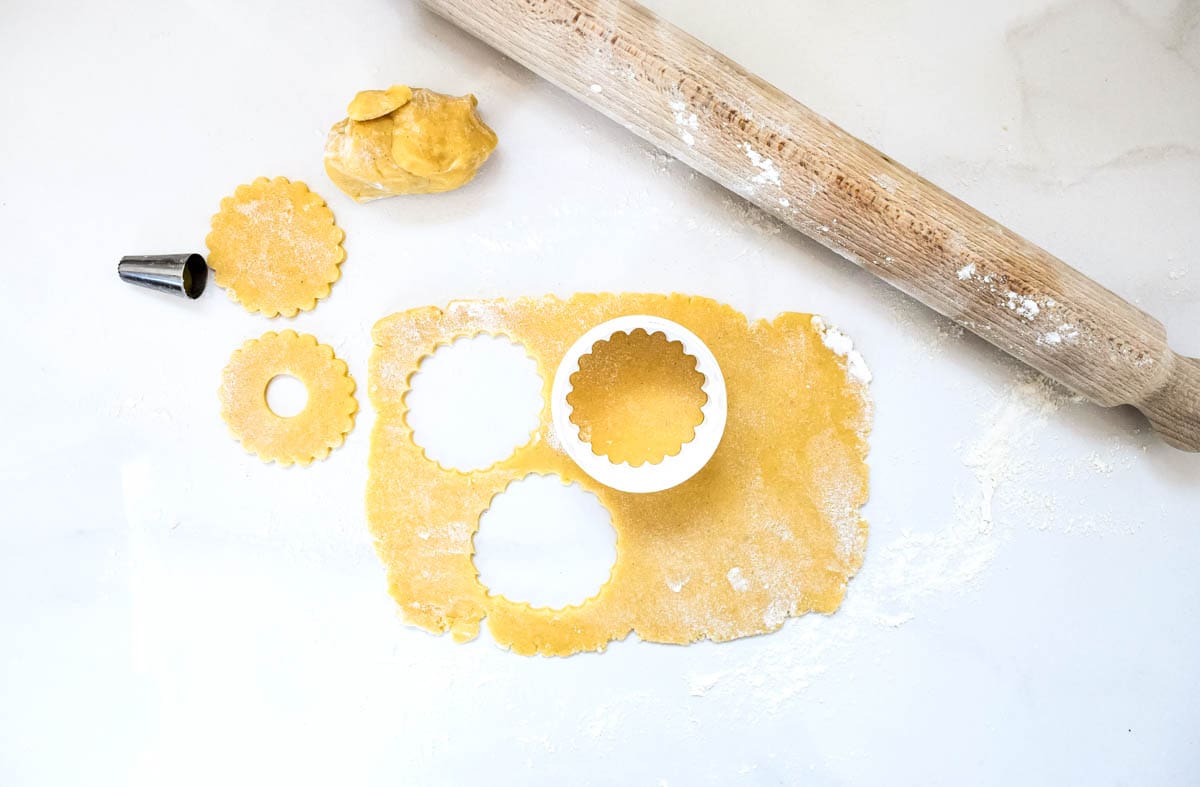
- Round Cookie Cutters: You can choose the cookie cutter size to suit your own preference. To create the smaller hole in the middle, I use the wider side of a piping bag nozzle.
- Baking Tray: Choose a tray or baking sheet that is large in size. You will likely need more than one to bake all of the biscuits, or do in batches. Line the tray with parchment paper/baking paper.
- Wire Cooling Rack: A wire rack helps air to circulate around the biscuits as they cool, so they don’t turn soggy on the bottom.
- Piping bags: For the icing.
- Small Piping Nozzles: Use a very small nozzle for precise icing application. Alternatively, use scissors to snip the very end from the bag.
- Toothpick or Skewer: If you want the classic party rings look, a toothpick will help create the lines in the icing to match the original biscuit style.
- Spatula/Wooden Spoon/Extra Spoons: For mixing the icing and adding colours.
- Measuring Equipment: I would always recommend to weigh your ingredients out accurately to achieve the best results.
Ingredients:
- Plain Flour: Use plain white all-purpose flour.
- Baking Powder: Gives the biscuits a slight rise. Be sure to check the expiry date and use within 6 months of opening for the best results.
- Caster Sugar: You can use white caster sugar or golden caster sugar, which will give the biscuits a deeper colour.
- Unsalted Butter: Use chilled butter straight from the fridge, not softened butter. This helps to give the biscuits the right texture.
- Golden Syrup: If you cannot find golden syrup in the supermarket you can make your own golden syrup with only a few ingredients.
- Egg: Use an egg chilled if possible for the same reasons as the butter.
- Vanilla Extract: For subtle flavouring.
- Royal Icing Sugar: The base for the icing, which hardens as it dries, making it perfect for detailed decorating.
- Food Colour: Use high quality concentrated food colouring for the best results. You can choose any colours you like to suit your preference or party theme.

Step-By-Step Guide – How To Make Party Rings Biscuits


Prep-Ahead Time Saving Tips for Party Rings Biscuits
Planning ahead makes this recipe even faster! Here are some ways to streamline your prep:
TOTAL TIME SAVED:
10 MINUTES
Make the Dough Ahead (Save 10 Minutes): Prepare the biscuit dough a day in advance. After making the dough, wrap it tightly in clingfilm and store it in the fridge. This lets you skip the dough-making step on the day of baking. You can freeze the dough for 3 months too!
Frequently Asked Question
Chilling the dough helps the butter in the dough firm up, which prevents the biscuits from spreading too much while baking. It also improves the biscuit’s texture, making them crisper.
It’s better to stick with plain flour for this recipe. Self-raising flour contains baking powder and salt, which can affect the texture and make the biscuits rise too much, losing their shape.
Make sure the dough is chilled before baking, and avoid overworking the dough, which can soften the butter too much. Using parchment paper on the baking tray also helps keep them in shape.
Let the iced biscuits set in the oven at the lowest heat for about 30 minutes or leave them at room temperature for 1-2 hours until the icing hardens.
Mastering This Recipe – Expert Tips
- Don’t Overwork the Dough: When mixing and rolling out the dough, avoid overworking it as this can result in tough biscuits. Mix just until the dough comes together and roll it out gently.
- Use Even Pressure While Rolling: Roll the dough evenly to about 5mm thickness. Using rolling pin guide rings can help ensure that the biscuits are uniform in thickness and bake evenly.
- Cool the Biscuits Completely Before Icing: Always wait for the biscuits to cool completely before applying icing. Warm biscuits will cause the icing to melt and become runny, ruining your design.
- Achieve the Right Icing Consistency: Royal icing should be thick enough to pipe outlines but still flow smoothly. If it’s too stiff, add a few drops of water; if it’s too runny, add more icing sugar.
- Test Your Flood Icing: Once you’ve thinned the icing for flooding, it should be fluid but not watery. The perfect consistency is when the icing smooths out within about 10 seconds after you drizzle it back into the bowl.
- Pipe a Border First: Before filling in with flood icing, pipe a border around the biscuit. This creates a “dam” to hold in the flood icing, ensuring it doesn’t spill over the edges.

Storage
- Store the decorated party biscuits in an airtight container at room temperature for up to 1 week. Ensure the icing is completely set before stacking the biscuits to avoid smudging the designs.
Freezing:
- Unbaked Biscuits: The dough can be frozen for up to 3 months. After making the dough, wrap it tightly in clingfilm and then place it in a freezer-safe bag. When ready to use, defrost in the fridge overnight before rolling out and baking.
- Baked Party Rings Biscuits (Undecorated): You can freeze the plain, un-iced biscuits. After they’ve completely cooled, layer them between sheets of parchment paper in an airtight container. Freeze for up to 2 months. To use, defrost at room temperature before decorating.
- Decorated Biscuits: I don’t recommend freezing party biscuits that have been iced, as the royal icing could crack, discolour, or lose its crisp finish when defrosted.

Homemade Party Rings Recipe – Party Rings Biscuits
Ingredients
For the Biscuits
- 300 g Plain Flour
- 0.5 tsp Baking Powder
- 100 g Caster Sugar
- 100 g Unsalted Butter
- 80 g Golden Syrup
- 1 Egg
- 1 tsp Vanilla Extract
For the Icing
- 450 g Royal Icing Sugar
- 80 ml Water, plus extra for flood icing
- Food Colour of your Choice
Instructions
To Make the Biscuits
- Preheat your oven to 170°C (150°C fan-assisted) or 340°F (300°F fan-assisted).
- Mix the plain flour, baking powder, and caster sugar in a large bowl until combined.
- Add the unsalted butter and rub it into the dry ingredients until the mixture is crumbly.
- Add the golden syrup, egg, and vanilla extract, and mix until a dough forms.
- Wrap the dough in clingfilm and refrigerate for 30 minutes.
- On a lightly floured surface, roll out the dough to about 5mm thickness.
- Cut your biscuits using a cookie cutter, and cut a small hole in the centre of each one.
- Place the biscuits on a lined baking tray, leaving space between them.
- Bake in the preheated oven for 10 minutes or until lightly golden.
- Remove from the oven, let the biscuits cool slightly on the baking tray, then transfer to a wire cooling rack to cool completely.
To Make the Icing and Decorate
- Mix the royal icing sugar and water and whisk for about 5 minutes until stiff peaks form and the mixture is white.
- Divide the icing into bowls and add food colour(s) as desired. Reserve a little white icing for the line decoration at the end.
- Transfer the icing to piping bags and snip off the very end of the tip of each bag.
- Outline the edges and centre hole of the biscuits with the icing. Let it set for 10 minutes.
- Thin out the leftover icing with a little extra water for flood icing and transfer to a piping bag.
- Fill the outlined areas with the flood icing, working quickly to prevent overflow.
- Use the reserved white icing to add decorative details, such as piping lines across the biscuits and pulling a toothpick through the lines to create patterns.
- Preheat your oven to the lowest setting and place the decorated biscuits back in the oven for 30 minutes to set.
- Turn your oven on to the very lowest setting and place your biscuits back in to set for 30 minutes before serving or storing.
Recipe Notes
- Chilling the Dough: Be sure to refrigerate the dough for at least 30 minutes before rolling it out. This helps the butter firm up, making the dough easier to work with and preventing it from spreading too much while baking.
- Thickness Consistency: When rolling out the dough, aim for a consistent thickness of about 5mm. If some cookies are thinner, they might bake faster and become overly crisp, while thicker ones might not bake through properly.
- Royal Icing: Ensure you beat the royal icing long enough (about 5 minutes) to achieve stiff peaks. This will make it easier to pipe outlines. For flood icing, thin out a portion of the stiff icing with small amounts of water until it reaches a more liquid consistency.
- Storage: Store the biscuits in an airtight container at room temperature for up to 1 week. Decorated biscuits should be completely dry before stacking to avoid smudging the icing.


Wow what a wonderful recipe. We made it for work and everyone loved it!! I sent them this recipe.
This is the perfect recipe for our jubilee street party! Thank you!
So cute and delicious! Love those party rings! Thanks for the awesome idea!
That birthday party was mine! Love party rings, they are hotly fought over in our house (and that’s before the kids get them!)