Easy Easter Chocolate Mini Egg Biscuits

With an abundance of leftover chocolate from Easter, this chewy biscuit recipe offers a perfect solution for using those extra Cadbury’s chocolate Mini Eggs. Chocolate Mini Egg Biscuits are guaranteed to be a hit with everyone.
Recipe Overview
Skill Level:
BEGINNER
Prep Time:
20 MINUTES
Cook Time:
10 MINUTES

What Makes This Recipe Great
Uses Up Leftover Chocolates: If you have lots of Easter chocolate left over, use the chocolate mini eggs in this recipe!
Easy To Make: These crunchy biscuits are easy to make with simple ingredients and Mini Eggs, that are usually found in the supermarkets around Easter time.
Freezer-Friendly– Simply freeze the dough in individual balls and save them for later.
These Chocolate Mini Egg Biscuits are a combination of textures—a crunchy biscuit with a soft, chewy centre complimented by the crunch of the Mini Eggs’ candy shell.
The addition of Mini Eggs and vibrant colours peeking through the biscuit dough make them visually appealing as well as delicious. Serve them alongside these Easter Creme Egg cookies and create an Easter Cookie platter that is guaranteed to please the whole family.
Mini Egg biscuits make a great alternative to traditional Easter eggs when it comes to gifting. Instead of presenting a typical Easter Egg, you can package these Easter cookies in adorable little gift bags and share them with your friends and loved ones during Easter celebrations.
Check Out More Easter Recipes:
- Creme Egg Cookies – A delicious chunky chocolate cookies with a mini Creme egg in the centre.
- Casatiello – This is a must try for Easter. A traditional Italian bread filled with salami and cheese.
- Rhubarb Scones – Great for the rhubarb season at Easter. Serve these sweet scones with clotted cream, jam and a pot of tea for the ultimate British cream tea experience.
Equipment Needed:
- Mixing Bowl: Use a large mixing bowl to combine the ingredients and form the cookie dough.
- Electric Mixer or Whisk: An electric mixer or whisk will help you cream the butter and sugars together for a smooth and fluffy texture. You can also use a stand mixer with the paddle attachment too.
- Spatula/Wooden Spoon: Used for mixing everything together and scraping the bowl.
- Measuring Scales: Use measuring scales to accurately weigh the ingredients for best results.
- Baking Tray: A baking tray or cookie sheet lined with baking paper/parchment paper. Choose one that is big enough to allow space between the cookie dough balls, allowing them to spread without touching and creating one big cookie! Use more than one if necessary.
- Cooling Rack: A wire cooling rack is helpful for allowing the cookies to cool evenly after baking and prevent them turning soggy on the bottom.
- Cookie Scoop or Spoon: Use a cookie scoop or spoon to portion out the cookie dough onto the baking tray.
Ingredients:
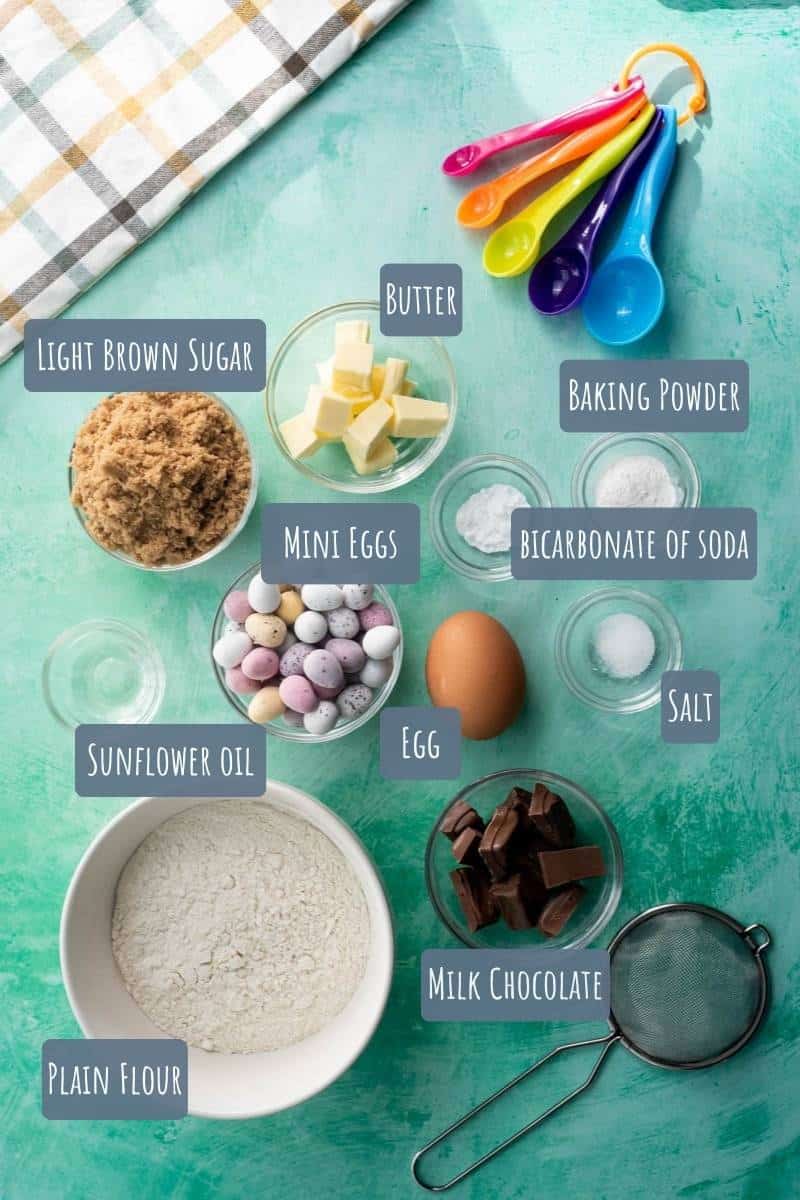
- Plain White Flour – I rarely use self raising flour in my recipes and instead add baking powder and bicarbonate of soda as the rising agent. Using plain flour saves on cupboard space too.
- Baking Powder and Bicarbonate of Soda – Both used here as a raising agent, giving your cookies a fluffy, full texture.
- Light Brown Soft Sugar – I love this sugar in cookies, it gives the dough a brown colour which enhances the overall look of the cookies in the finished product. Using other sugars in it’s place can alter the texture, so be aware of this if you choose to do it.
- Salt – Used to enhance the flavour in the cookie dough.
- Unsalted Butter – Unless specified I rarely use salted butter when baking sweet treats and would rather add the salt separately if needed to control the amount used. I don’t recommend substituting with salted butter in this recipe.
- Milk Chocolate – I often melt chocolate into my cookie dough. It gives a really rich flavour to the cookie once baked.
- Sunflower Oil – Be aware of substituting this oil with any other oils that do not possess a neutral taste.
- Egg – allow your egg to reach room temperature before using.
- Cadburys Chocolate Mini Eggs – The bright colour of the crispy candy shell is what makes these cookies stand out. However, you can get creative and choose a different mini egg if you’d prefer.
Substitutions and Additions:
Wondering if you can substitute or add an ingredient? Here, I will tell you if that’s possible.
- Different Chocolate Eggs: You don’t have to stick with Mini Eggs here, there are a lot of different types of Easter mini eggs you can try instead. you can try Kitkat Eggs, Smarties Eggs, M&Ms Eggs and Oreos Eggs in your cookies plus many more.
- Cocoa Powder: For the ultimate chocolate experience, mix in some cocoa powder into the cookie dough along with the flour (substitute about 30g of flour for the same amount of cocoa powder). This will intensify the chocolate flavour and create a richer cookie with a darker colour.

Step-By-Step Guide – How To Make Easter Biscuits With Mini Eggs






Frequently Asked Questions
Yes, you can adjust the size of the biscuits according to your preference. For smaller biscuits, use a smaller cookie scoop or roll the dough into smaller balls. For larger biscuits, use a larger scoop or shape the dough into bigger portions. Keep in mind that the baking time may vary depending on the size of the biscuits.
Absolutely! You can experiment with different flavours by adding ingredients like vanilla extract, almond extract, or even a touch of cinnamon or nutmeg to the dough.
Mastering This Recipe – Expert Tips
- Revitalise Your Biscuits: If you find that your Mini Egg biscuits have lost some of their freshness, you can easily revive them. Place the biscuits in a preheated oven for about 4-5 minutes. The heat will help to restore their texture and bring back some of that freshly baked taste.
- Adjusting Cookie Size: You have the flexibility to make your Mini Egg cookies as big or small as you desire. However, remember to leave enough space between the cookies on the baking tray to allow for spreading during baking. Keep in mind that larger cookies may require slightly longer baking times, while smaller ones may need less time in the oven.
- Cutting the Mini Eggs: This can be difficult, so you can always just place them in a bag and give them a quick bash with a rolling pin before using as a topper.

Storage
- Airtight Container: Once the cookies have completely cooled, transfer them to an airtight container. This helps to preserve their texture and flavour while preventing them from becoming stale. They will keep for 4-5 days.
- Room Temperature: Store the container of Mini Egg biscuits at room temperature, in a cool and dry place away from direct sunlight or heat sources. Avoid storing them in the fridge, as the moisture can affect the texture.
- Layering: If you need to stack the cookies in the container, place a sheet of parchment paper or wax paper between the layers. This prevents them from sticking together and maintains their individual shapes.
- Freeze for Extended Storage: If you have a large batch of Mini Egg cookie dough or want to save some for later, the unbaked dough without the Mini eggs added can be frozen. Place the uncooked cookie dough in a freezer-safe container or zip-top bag, and ensure it is well-sealed to prevent freezer burn. They can be stored in the freezer for up to 2-3 months.

Easy Easter Chocolate Mini Egg Biscuits
Ingredients
- 200 g Plain Flour
- 1 tsp Baking Powder
- 0.5 tsp Bicarbonate of Soda
- 150 g Light Brown Soft Sugar
- 0.25 tsp Salt
- 50 g Unsalted Butter
- 60 g Milk Chocolate
- 1 tsp Sunflower Oil
- 1 Egg
- 150 g Chocolate Mini Eggs
Instructions
- Preheat the oven to 170°C (340°F).
- In a bowl, mix together the flour, baking powder, bicarbonate of soda, and salt. Set aside.
- In a heatproof bowl or pan, melt the butter, oil, and milk chocolate together. Stir until smooth and well combined.
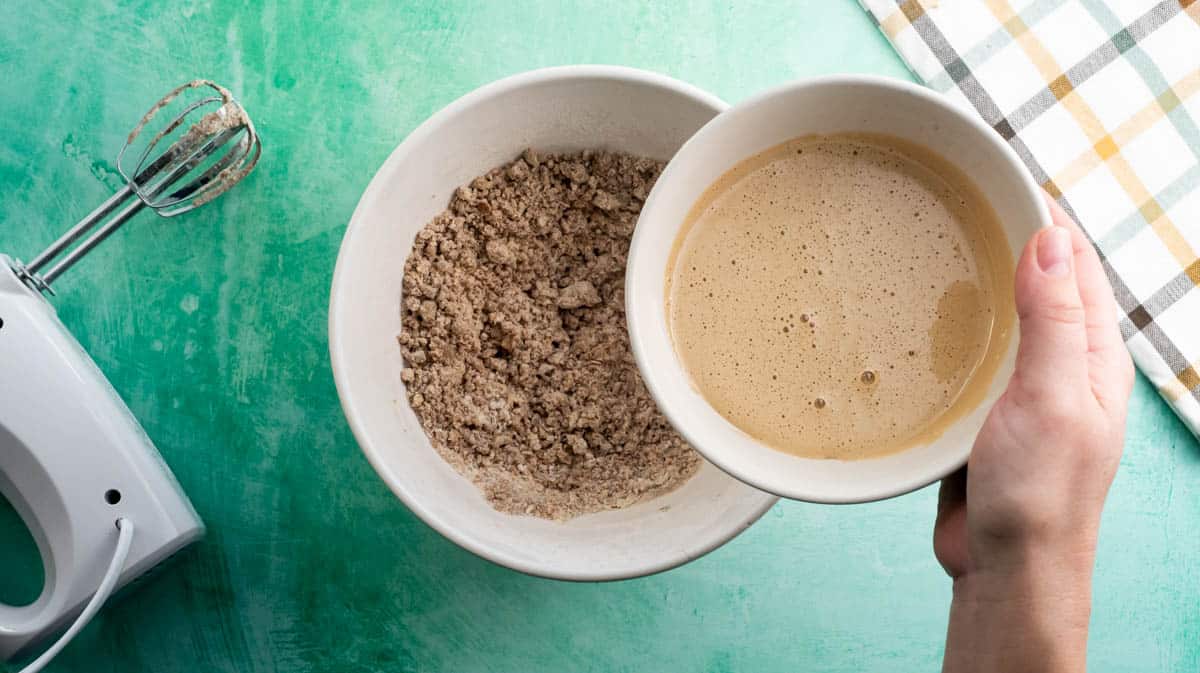
- Pour the melted mixture into the flour mixture. Mix until the ingredients are well incorporated and the mixture becomes crumbly.
- In a separate bowl, use a whisk to cream together the light brown sugar and egg until creamy in texture.
- Once the flour mixture has cooled, add the egg mixture to the bowl. Mix until a stiff dough forms. Be careful not to overmix the dough.
- Cover the dough and place it in the fridge to chill for 30 minutes.
- Remove the chilled dough from the fridge.
- Place 3/4 of the chocolate mini eggs into a bag and crush them into small chunks using a rolling pin.
- Pour the crushed mini eggs into the dough and mix them in, ensuring they are evenly distributed throughout. Divide the dough into 10 and roll each dough ball to fully incorporate the mini eggs.
- Place the cookie dough balls onto a lined baking tray and gently flatten each ball slightly with your hand.
- Cut the remaining 1/4 of the chocolate mini eggs into halves and press them into the tops of the cookies.
- Bake the cookies in the preheated oven for approximately 10-12 minutes. If you prefer a slightly firmer texture, you can bake them for a little longer.
- Once baked, leave the cookies to cool and harden slightly on the baking tray before transferring them to a cooling rack.
Video
Recipe Notes
- Revitalise Your Cookies: To refresh your Mini Egg cookies, heat them in the oven for 4-5 minutes. This will restore their texture and taste.
- Customise the Chocolate: Use your preferred chocolate eggs instead of Mini Eggs to personalize the cookies to your liking.
- Adjust Cookie Size: Make your cookies any size you want, but remember to leave space on the baking tray for spreading. Adjust baking time accordingly.
- Embrace Chilling Time: Chill the dough before baking to enhance texture and flavour. Patience pays off!
- Store: At room temperature in an airtight container for 4-5 days.


